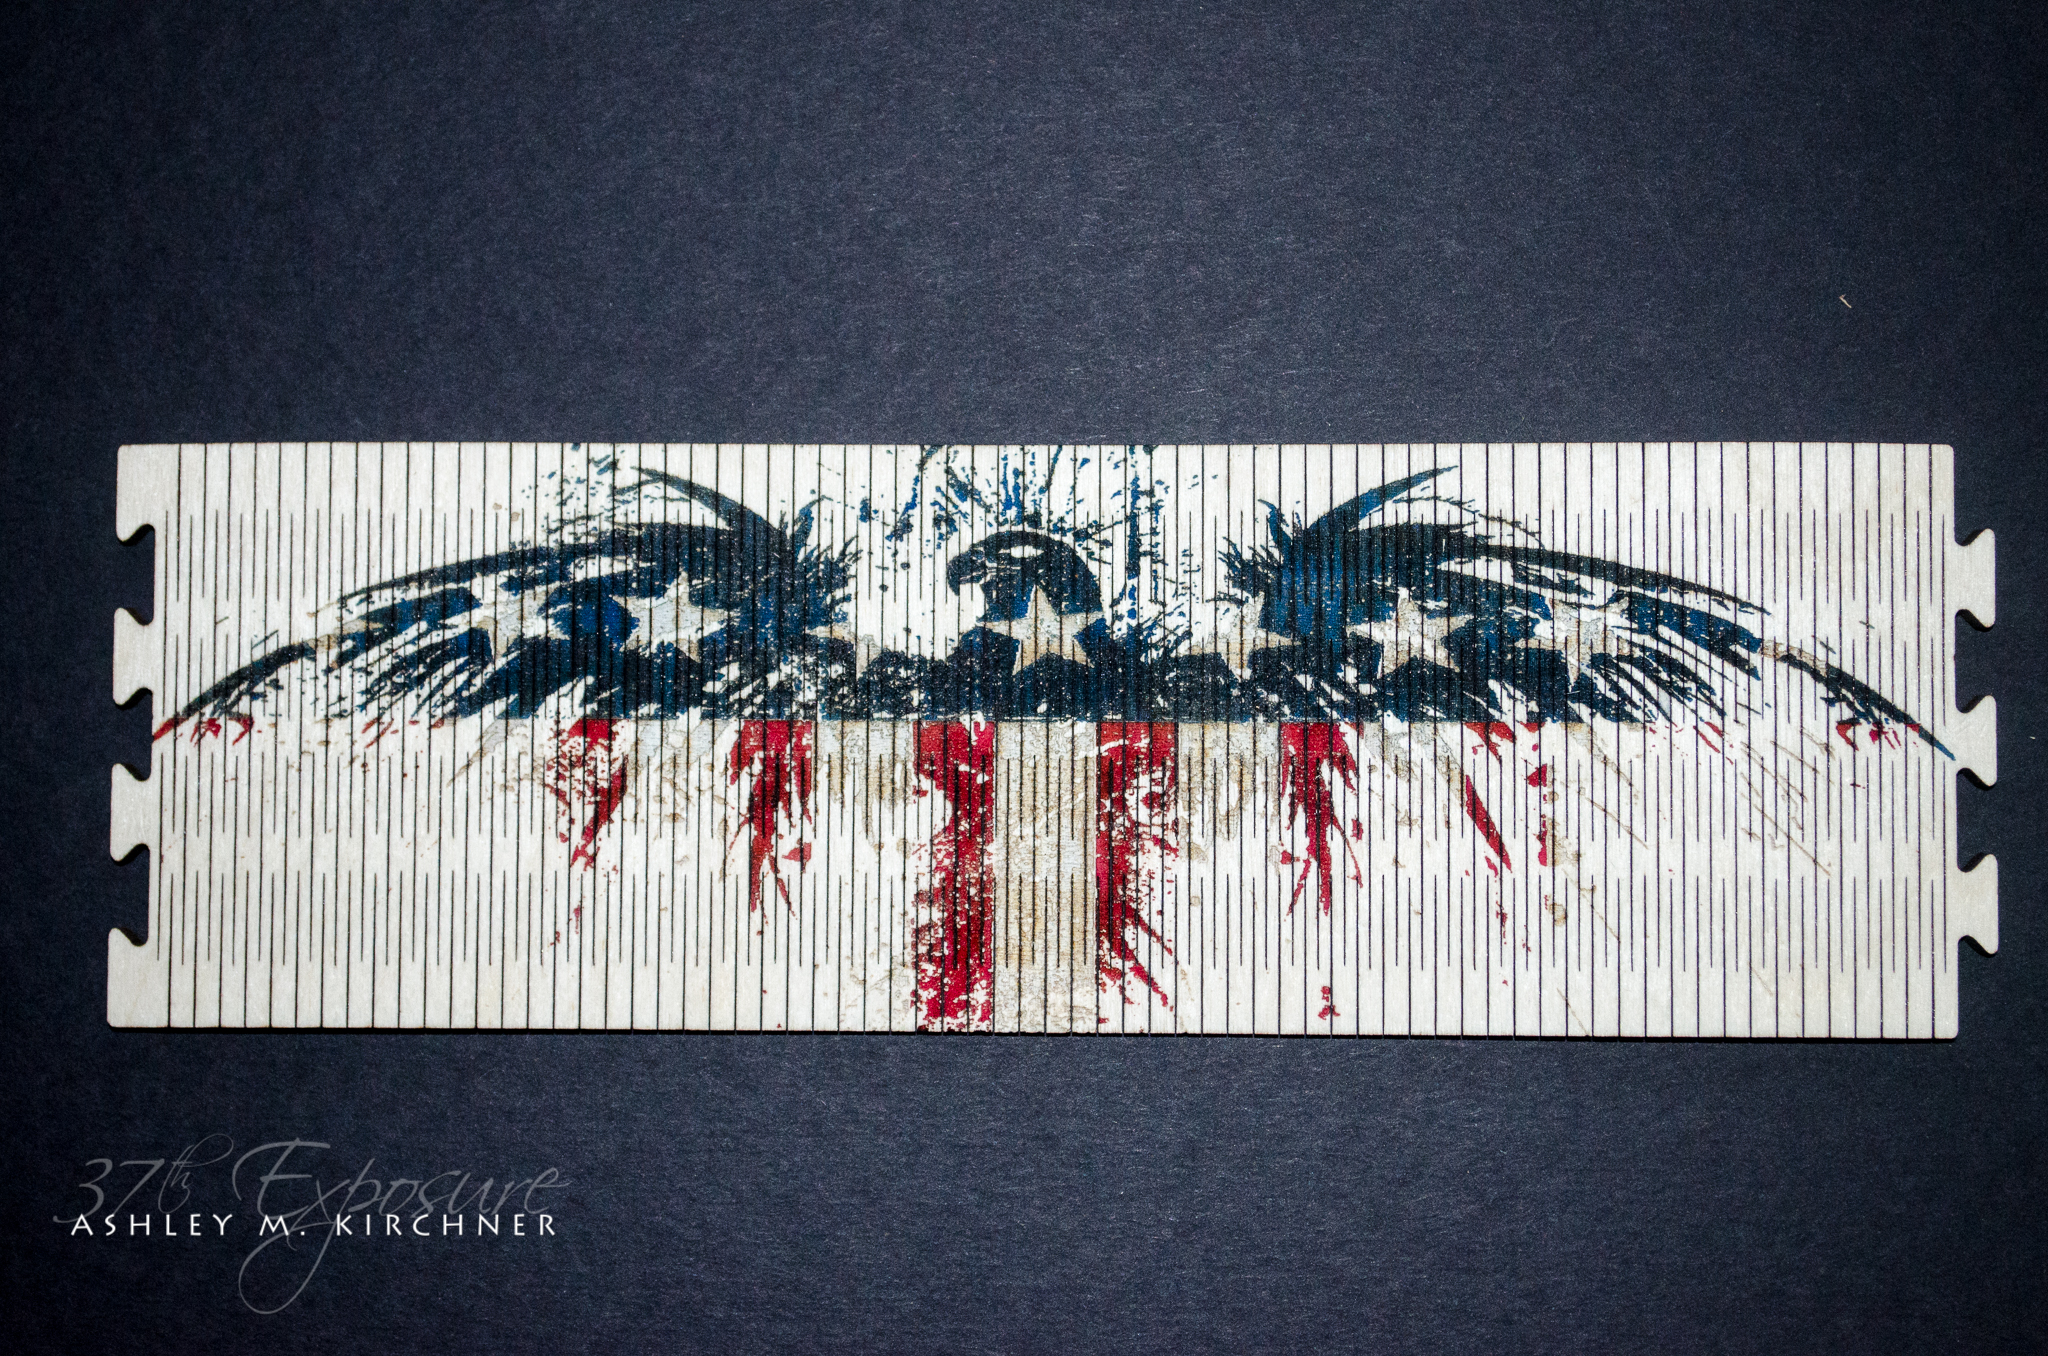
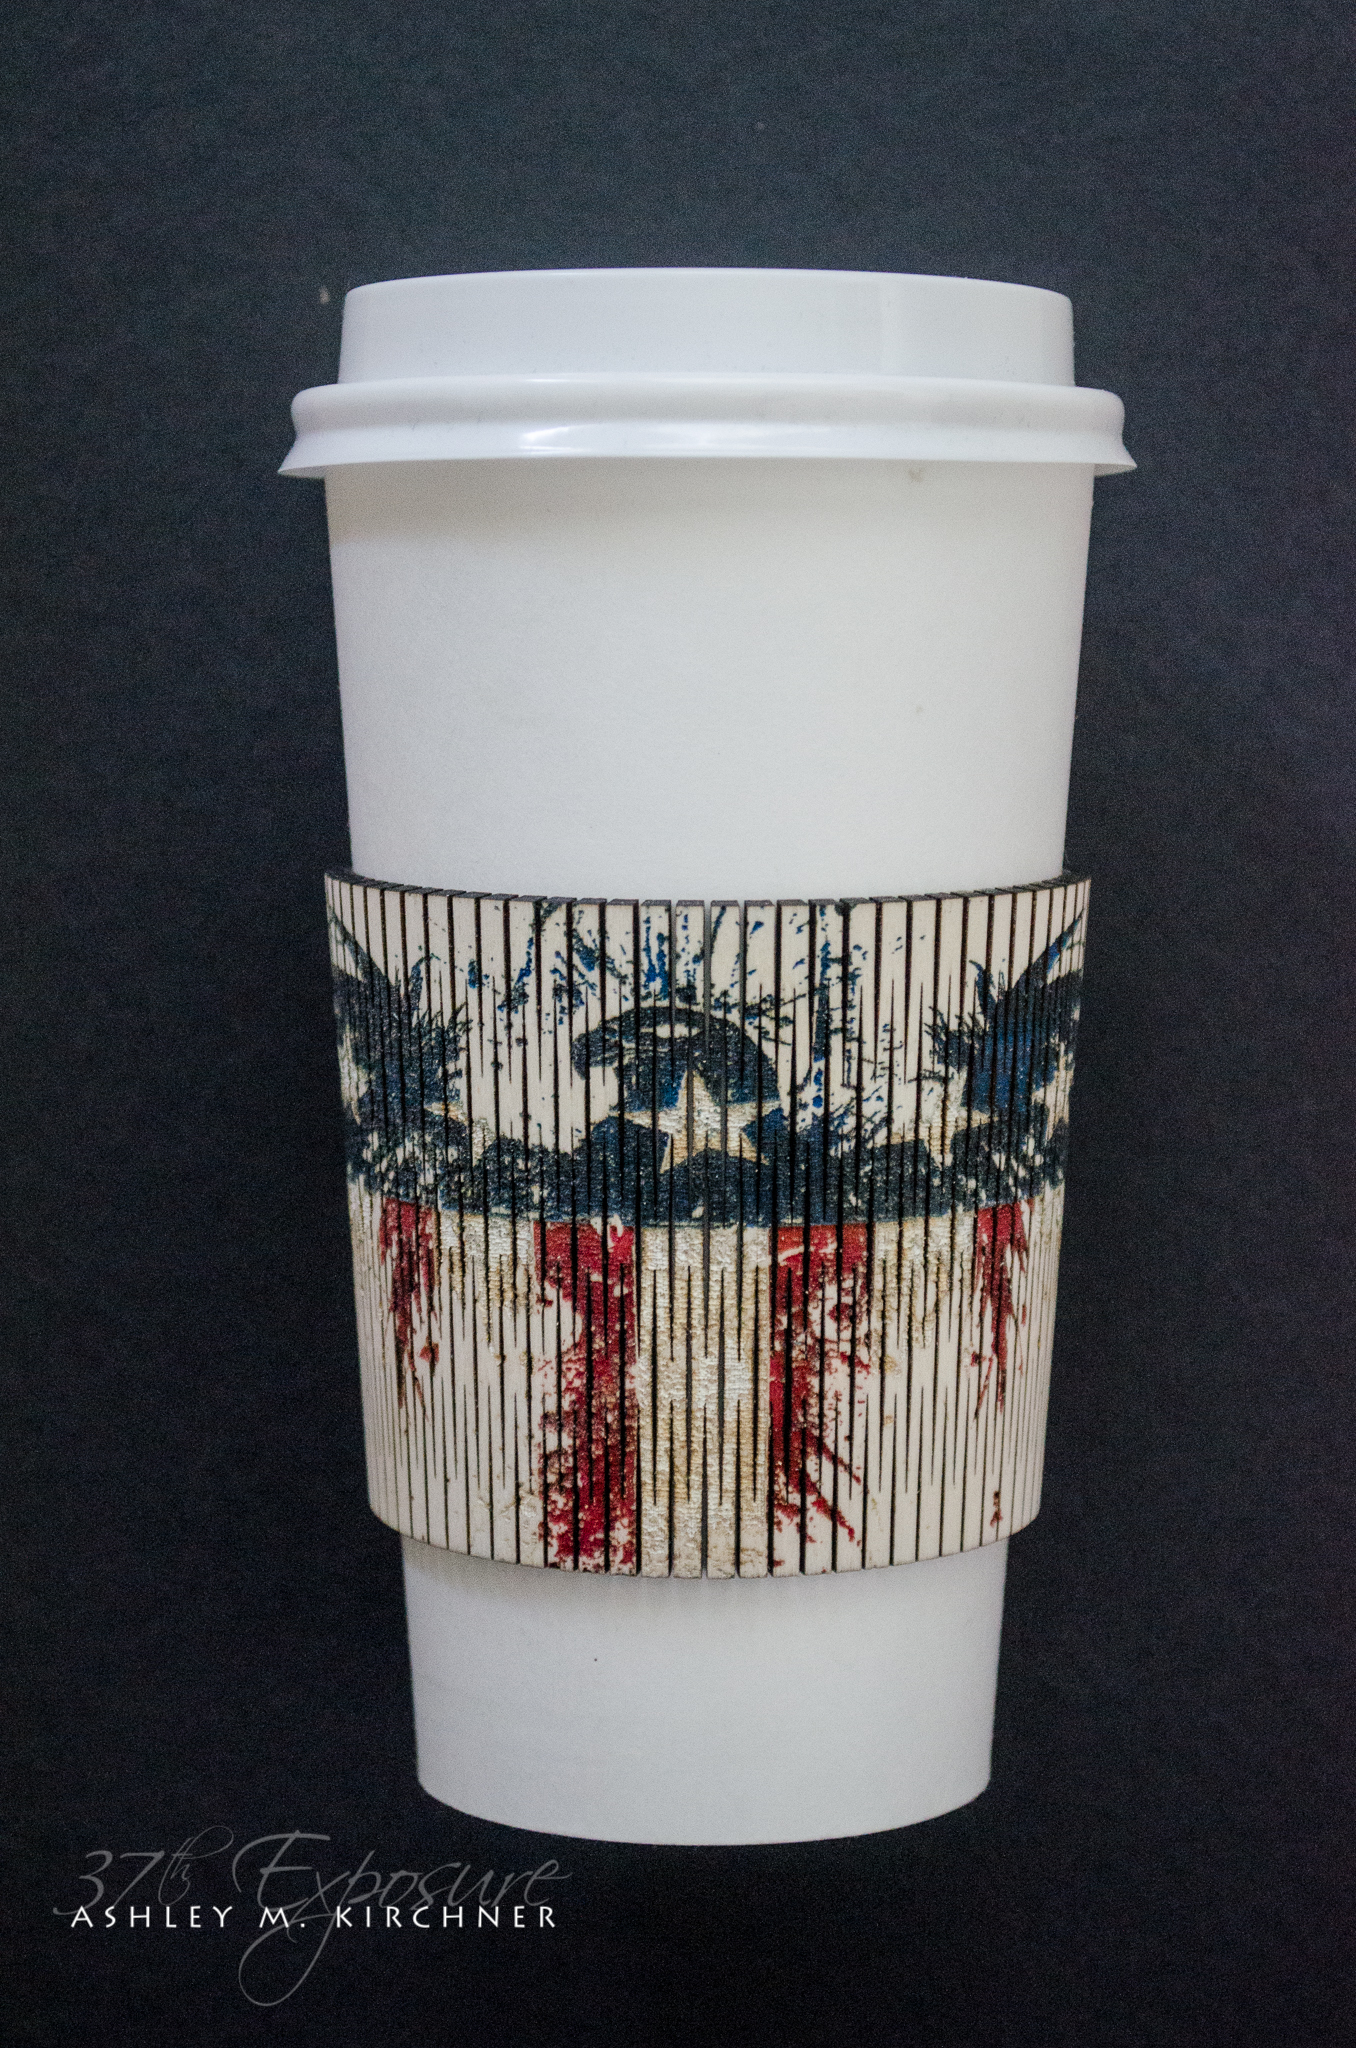
After my last experiment with colors, and vowing not to do that again for a while (because of the labor involved), I had to try some new release liner tape that we have laying around at work (graphics shop), so naturally … more experiments with engraving and painting. Though in this case I also threw in some playing with speed and power. There is white paint there, however because it gets burned, you can’t really tell. I considered re-painting it after the slits were cut but decided I like the rustic look so I left it as is and just peeled the tape of. Since I do two at a time, I am going to re-paint the white on the second one and compare them.
Edited to add: Edited to add: The tape I’m using is made by RTape (http://www.rtape.com/product-lines/conform-series-with-rla) and it’s specifically the 4050RLA and 4075RLA ones. It can also conform to curved surfaces (hence the name ‘Conform’). Easy to use, easy to lift, leaves no residue.
That’s really cool. Nice work. Did you paint the piece white before cutting/engraving? Then paint the blue/red after engraving?
No. The whole piece is covered with tape. I engrave the darker color part first (blue in this case), paint it, then cover it up and engrave the red area and paint that. Once those are done I remove all the tape and put a fresh layer on it, engrave the white area and paint that. There’s only white in the stars and between the red ‘bars’. What you see there is the natural wood color. The white paint for burned during the clit cutting, and it gave it a rustic look.
This isn’t an easy job, it’s rather labor intensive, which is why I’m testing various release tapes, see which one works better. Painter’s tape works, but it has a high adhesion (even the one designed for delicate stuff.) This tape releases a lot easier and it doesn’t pull the wood fibers like painter’s tape does. So in this particular case, there were several steps:
First the image had to be broken up into 3 parts: blue, red, and white. Then I covered the entire piece of stock material with tape, on both sides (it comes in a 12" roll, so I can cover the whole 8x12 sheet of wood with one piece of tape.) Then I engrave the blue area, and airbrush it. After it dried, I cover all of the blue engraved part with another piece of tape and engrave the red area. Once that’s been airbrushed and it dries, I remove the last layer of tape I just put on, but leave the first one. Then I cover the whole piece with a new layer of tape, engrave the white areas and paint them. Once that’s done, I cut the actual pieces out of the stock material, flip them over and cut the slits from the back. I do it from the back side so that the front stays clean with thinner cut marks. Once it’s all done, I remove all of the tape.
It is a great result. I was thinking you may be able to paint the entire piece white (or whatever colour you want the background) first, then cover the entire piece with tape, engrave your 1st colour (e.g. blue) then paint, then move onto extra colours (as you currently do). Could maybe remove one step worth of taping if you painted the entire piece first. But, it depends on whether you can engrave through the paint with no issues.
You can, but I wanted to retain the wood’s natural color.