FYI, you can use Adobe Illustrator files with CorelDraw. You just have to make sure to save them in the Illustrator8 version.
@Nedman Hi Ned, Can you explain what you mean by ‘board ID’?.
Thanks @Bill_Keeter thats a great tip.
@Gail_Lingard in Corel laser under device initialization your need to set the board type (should be M2nano but will be labeled on your board) and you need to put in the board ID which is a unique number for your board which will be on your board as well (white sticker).
Highlighted is the mainboard type (If your board is labeled as a M2Nano select the M2 board as shown). Also highlighted is the Device ID which is the number that will be shown on the board on a white sticker.

Thanks @Nedman I found the label on the M2 Nano and have input the details in coral draw 12 settings.
The program is communicating with the machine. The laser is moving but nothing is cutting/ ENGRAVING. I have used laser machines before where the colour 255/0/0 RGB IS THE CUT LINE AT 0.1 but cant see where you would make these settings. The laser is not aligned yet so this may be the issue. I just thought I would ask incase there is something else i am doing wrong? thank you for your help.
@Gail_Lingard CorelLaser isn’t very sophisticated so cut and engrave operations are separate runs and it doesn’t use color for cutlines. Set the corellaser settings as seen in the pic. In coreldraw select the elements to engrave and then open the corellaser engrave panel and set speed and start. For cutting again select your cut element and go into the corellaser cut panel and set speed. Note for cutting, the line widths need to be set to 0.01mm or less otherwise it will cut both sides of the line. As to the laser you will definitely need to check the alignment if the tube is firing and nothing is reaching the bed.

I had to add some washers to the first mirror base to get the laser to fire in the centre. The second mirror I managed to get the laser to fire in the centre by removing one of the screws on the base plate and moving the mirror far left. The third mirror the laser does not reach at all. (so no chance of any cutting) Confused and wasting lots of time.  Is there anyone running a business setting up these machines?
Where is the laser hitting for the 3rd mirror?
Sorry no one doing a business setting these up, one of the downsides to these cheap chinese laser cutters.
Its not hitting it at all. Thank you for your help
put a big sheet of paper in front of the mirror to see where the beam is going if it’s that far off.
That worked. I can now see its firing about 5cm right of the mirror. I take it although my second mirror is firing in the centre its not right?
this is what I have done to get the mirror in the centre.
https://drive.google.com/open?id=0BzNubLxU_-XWX0JTRUU4U2xwaDA
This is where it is firing for the third mirror.
https://drive.google.com/open?id=0BzNubLxU_-XWNURpZmpNYmNXV2c
The fact that you are having to remove a screw and pivot the 2nd mirror tells me there is something screwy with the first mirror. Can you post a pic of the first mirror?
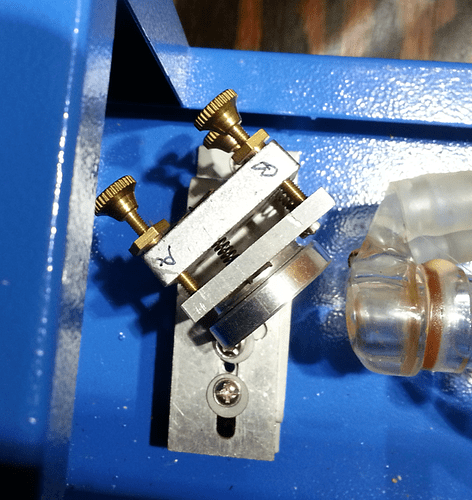
this is the first mirror
https://drive.google.com/open?id=0BzNubLxU_-XWZUhlWFQ3eTFrVlE
i have raised the plate with 4 washers under the two screws.
https://drive.google.com/open?id=0BzNubLxU_-XWM00yMkJwVWJBclE
You probably need to turn the screws on the first mirror in so you have room for adjustment to hit the second mirror. I know that will throw the alignment on the first mirror out but it will be better to adjust it by drilling out the slots on the mounting some to get it aligned if needed.
@Nedman got there in the end. Mirrors aligned and cutting!  excellent stuff.
