The final instalment of my insole blog series is now available and it’s a big one.
This one details the image manipulation techniques and the CAD work that goes into the scanning and design of the Variable Density and Form Fitting insoles. Uses Open Source and a free software tool chain.
This could be really useful for podiatrists the world over - insoles for pronation can cost over £150 ($200?) and don’t usually match feet contours. Good job!
Could do with a fair chunk of automation - however, I have some questions about the variable density work. You are basing the variable density on the thickness of the insole by your process, effectively.
I’ve been reading some work by people developing custom fitted supports for prosthetics, and in their work, they found that the ideal comfortable support was made by inverting the density of the contacting surface. That is to say, where the skin is thin over the bone, or hard inclusions are present, (i.e. a probe finds high density) the support’s density should be low and soft; where the skin and muscle are thicker over the bone and thus the probe finds lower density/higher penetration) the support can be stiffer, higher density.
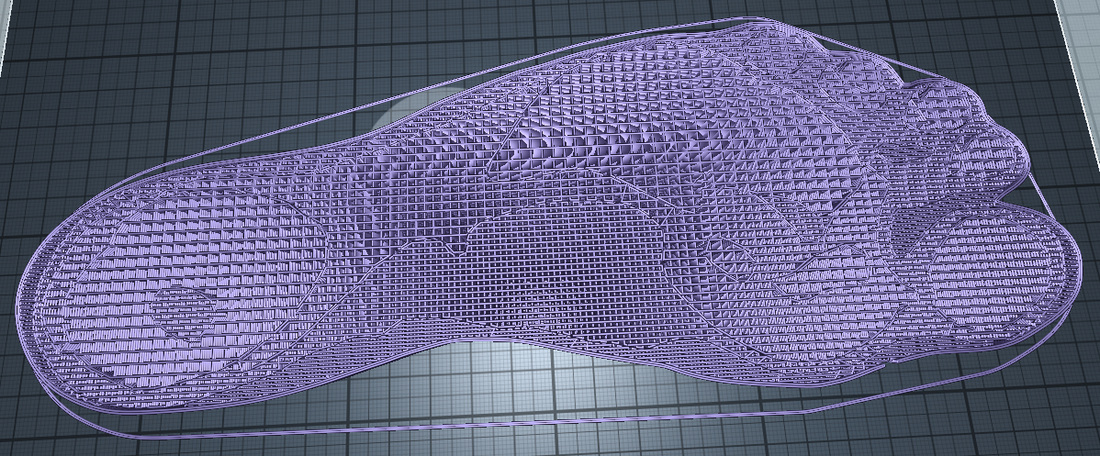
Your example here http://www.gyrobot.co.uk/uploads/1/6/8/8/16887130/8177964_orig.jpg appears to put a nodule of much denser support right in the center of the heel, while most of the rest of the foot appears to reasonably match what I would expect from an inverted density design, so you are close to the pattern their research recommends.
Can you comment on why that small circle of high density appears in the sample? Was that a deliberate adjustment? It does not show up on your demonstration of how to perform the variable density setup, which made me curious if it was something you had felt was needed for your comfort.
The variable density and the form fitting are two different outcomes from the process, although they also could be combined together.
Therefore the variable density insole was a constant thickness of 10mm. The areas of high pressure are a softer density to try and spread the load to help prevent diabetic ulceration.
The heel nodule that you refer too was part of an original scan that I found (you can see here : http://www.thingiverse.com/thing:581443) when developing the process, and it is this variable density print that you see. In the tutorial that I gave for the scan of my own foot it is a different scan so they are not the same. There is a point in the process after the artistic cutout in Gimp where areas like these could be removed if deemed uneccessary. The nodule should probably have be removed in this instance.
