Has anybody machined the Ferris waxes with a cheap cnc engraver? Just bought a block of the gold wax and wondering whether anybody has speed and feed rates as a starter for ten ?

Any ideas welcome, cheers, Nigel
I’ve been struggling with engraving anything accurately with this machine, one problem was the play in the z-axis bearings. I thought I could just replace them with bearings off ebay…but homemade brass bearings were easy to make and gave me a far better result.
The other upgrade I’m working on is the spindle. My basic design approach is to use an ER11 chuck with a 10mm straight shank and to belt drive this with the existing motor. The spindle will be supported by ball bearings and the motor will then run in reverse. Here is my sketch of the spindle design:
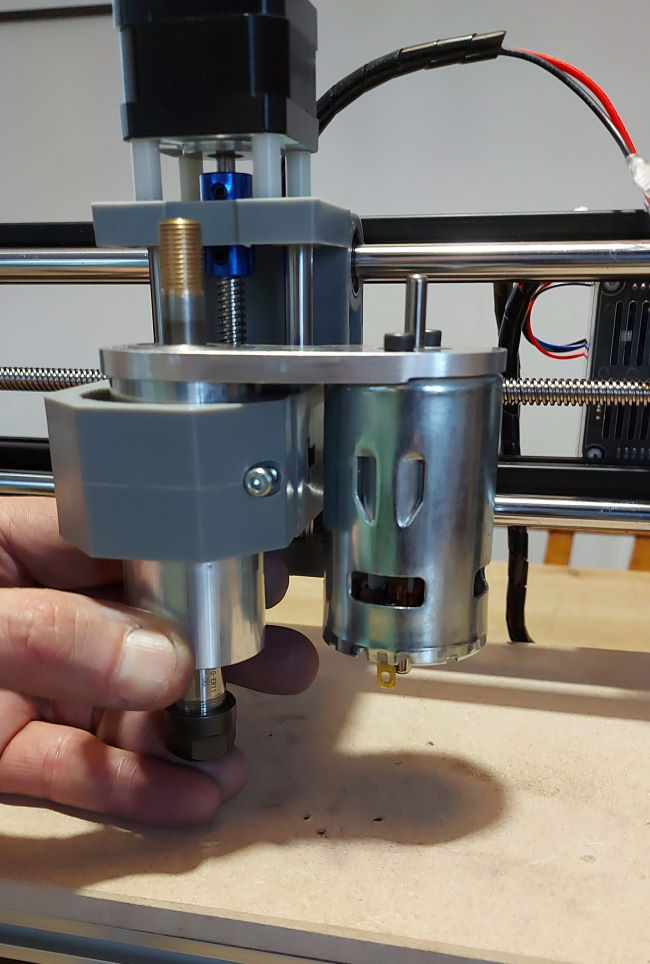
and this is where I’ve got to with the machining of parts so far
What kind of bearings are you using?
You’ll want to use angular contact bearings not normal ball bearings or you’ll damage them pretty fast. Ball bearings are made for radial loads You need a bearing that can handle the axial load of the end mill pushing up.
I agree in theory, but there is someone who has described making a router spindle using a brushless outboard motor who has reported years of successful service with skateboard bearings. So I guess milage might vary. If you aren’t doing much plunge cutting it might be fine?
I think this was the build. Don’t remember where the discussion of bearings was…
I’ve made it with ball bearings, must admit that I wanted tapered roller bearings just could not find them in this size. Also, I thought angular contact would be too expensive, but looking on bearingboys they are not too bad at just under £10 each. I then looked at it again as an upgrade and must admit that I’m not going to use a huge pre-load and I’m keeping the original motor. Frankly, anything is an upgrade on this cheap motor with a collet chuck, locked with grub screws to a small shaft.
Actually, when I removed the chuck from the motor only one of the grub screws was vaguely tightened.
My very first manual hobby mill arrived with ball bearings on the spindle and I used it like this happily for a year before swapping them for taper rollers. I will have a go and see how it behaves.
Also meant to say that these bearings are quite substantial, they are 28mm OD, 10mm ID and 8mm wide
So I’ve finally assembled the spindle and tried it. Just put this video together to show the story of the build. I have some better sized belts on order so I can use the other pulley ratios. Also, now need to try engraving brass again

This spindle conversion with the belt drive is so much smoother, getting great results machining wood. Partly down to the spindle running more accurately and less vibration. Also, I now have a wider speed range. Any interest in some simple plans?
Of course!
Hi Guys.First time cnc user and just got a 3018 Pro.Did a test on it and it came out really small.Problem with z axis now.When I hit the right up button the spindle moves down/down button and it moves up.
My z axis is backkwards.
I just managed to machine some stencils from a scrap of 3mm MDF
As the centre parts of letters get released and float I use fine copper wire glued across the part to hold these in place. As I shake the enamel powder onto the surface it happily moves around this wire and you don’t see it after firing.
I then used this to enamel some signs for my hobby website.
The Genmitsu 3018 is quite competent at this type of machining.
I like the simplicity and low cost of the Genmitsu 3018, but the play in the z-axis drives me mad. To the point that last year I made a pair of brass linear bearings. They were better. But I reamed them 8mm, believing the z rails were 8mm.
Today I had some time to sit and look at the the issues with the z-axis and what I could do to make it better. That’s when I realised the rails are not 8mm. They are 7.96mm
Luckily I had kept the rails from an old inkjet printer, these are 7.995mm in diameter. I cut and machined two rails 95mm long, fitted longer 45mm linear ball bearings and the z-axis is now dramatically better.
I wonder how many 3018’s have been made with undersize z-axis rails? The x and y axes are 10mm and checking with the micrometer these are 9.995mm in diameter. OK, they need to be larger to reduce the bending, but they do fit the bearings.
Sorting out the z-axis rails and increasing the stiffness of the x and y axis springs on the backlash nuts has made this significantly tighter overall. Therefore, thought I should have another go at machining aluminium. Firstly though I bought some better quality cutters.
Considering the cost of this machine I think the results of a simple square and circle are actually ok:
I’ve been doing more upgrades to the 3018-pro with new x-axis rails and a new z-axis. This meant I needed to square up the head. There was just not enough room to fit and use a DTi and so I went back to the good old fashioned dogleg and feeler gauges to square the head.
The dogleg is a pointer made from 1/8" mild steel that was just bent to a rough shape in the vice. A bit of care needed not to damage the end that goes into the collet.
Then you just fit this in the spindle, tighten it up, ensure power to the machine is off.
The squaring process is a case of swinging front to back and measuring the height to the tip with a set of feeler gauges. You can do this direct on the bed or onto a block. Keep measuring and adjusting until the same feeler gauge fits under the point at the front and rear.
It is approximately 30mm between the point and the rotating axis, hence with a 1 thou (0.0254mm) feeler gauge you can see that the angle is going to be very small. In fact you can get better than this as you can feel the amount of pressure on even a 1 thou feeler gauge.
Coming from manual machining as a hobby, CNC and the use of tabs is all new to me. I created tabs manually within carbide create before realising they could be just added after setting out the design.
Having used these to make a Kant Twist Clamp I now need to work out how to create code from FreeCAD 0.19 - I will let you know how I get on.
This is my first proper CNC project and although a bit rough, it has been fun.
Nice! Those type of clamps are always super neat to me. Thanks for sharing 
Yeah, the Path workbench definitely changed in 0.19 and I’m trying to start over learning how to use it. So far with 0.19 I’ve used kiri:moto to toolpath my FreeCAD designs.